
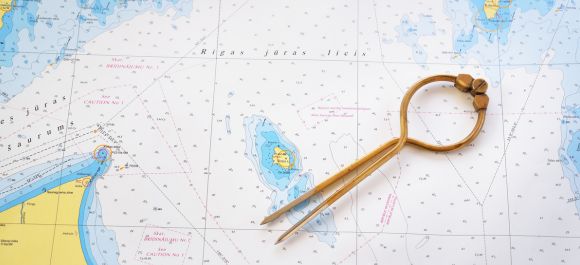
 Learning to read a nautical chart is an essential skill for any sailor, whether you’re navigating calm coastal waters or venturing out into open seas. With a deep understanding of these charts, you can anticipate potential hazards, plan safe routes, and navigate confidently. From interpreting depth markings to identifying underwater obstacles, every symbol on a nautical chart serves a crucial purpose in guiding your journey. Mastering how to read a nautical chart not only ensures your safety, but it also enhances your overall maritime experience.
Maritime navigation requires constant vigilance and a thorough understanding of the environment in which you operate. Knowing how to read a nautical chart is not just a technical skill, it is truly the key to ensuring your safety and that of your crew at sea. Each symbol, color, and line drawn on a map contains crucial information that can make the difference between a peaceful exit and a dangerous situation. Whether you are a beginner sailor looking to understand the basics or an experienced sailor looking to improve your knowledge, mastering marine cartographic reading is a continuous learning experience. Modern nautical charts concentrate a wealth of information that, once deciphered correctly, will allow you to anticipate dangers, plan your routes accurately, and navigate with confidence. In this comprehensive article, we’ll explore together all the essential aspects of reading a nautical chart, from basic symbols to advanced techniques for avoiding dangerous areas.
Understanding the basics of a nautical chart
Before you can navigate safely, it is essential to understand how a nautical chart works and what information it contains. A nautical chart is not simply a visual representation of the coastline, it is a sophisticated technical document that condenses decades of hydrographic surveys and marine observations. Each element on the map has been carefully measured, verified and standardized according to international conventions that allow all mariners in the world to share a common language. This standardization ensures that a French navigator will be able to understand a Norwegian or Australian map by recognizing the same symbols and colors. Familiarity with these universal conventions is therefore the first and indispensable step for anyone who wants to set sail safely.
The different types of nautical charts: paper, electronic and raster
Nautical charts now come in several formats, each with specific advantages adapted to different navigation situations. Traditional paper maps remain the historical reference and maintain unparalleled reliability, not depending on any source of energy and offering an immediate overview of your navigation area. They allow you to directly annotate your route, to report remarkable points and to work with traditional instruments such as the compass and the Cras ruler. Vector electronic charts, often referred to by the acronym ENC (Electronic Navigational Charts), represent the modern evolution of marine cartography and offer remarkable interactive features. These smart maps allow you to show or hide certain information according to your needs, to automatically calculate routes and to integrate safety alarms when approaching dangerous areas. Raster maps, on the other hand, are essentially digitized versions of paper maps, maintaining their traditional appearance while benefiting from certain digital advantages such as zoom and the ability to display your GPS location in real time.
The scale of a nautical chart and its importance for accuracy
The scale of a nautical chart directly determines the level of detail you can use for your navigation and significantly influences your ability to identify potential hazards. A small-scale map, for example at 1:250000, covers a large geographic area and is perfect for planning a long trip on the high seas or a coastal crossing over several tens of miles. However, this big picture comes at the expense of fine details, and many local obstacles simply won’t be represented at this scale. Conversely, a large-scale map like a 1:10000 or even a 1:5000 port map will display every buoy, rock, and port facility with remarkable accuracy, allowing you to navigate safely in congested or shallow areas. Choosing the appropriate scale therefore depends entirely on your type of navigation: you will use small-scale maps for offshore navigation and large-scale maps as soon as you approach coastlines or enter a port. A savvy navigator always has a comprehensive portfolio of maps covering various scales to suit each phase of their journey.
Essential symbols and colors you need to know
Nautical charts use a universal color code that makes it possible to instantly identify the nature of the areas represented and their depth characteristics. Blue, in its various shades, consistently indicates areas of water, with darker hues generally representing deeper water and lighter hues signaling shoals or shallow areas. White or very light blue refers to areas where the depth is sufficient for standard navigation, while green or blue-green highlights shallow areas that require particular vigilance depending on the draft of your boat. Yellow or beige represents areas that open at low tide, warning you that low-tide navigation would be impossible or extremely dangerous. Finally, gray or brown indicates land that is permanently emerged. Beyond colors, the symbols constitute a true maritime alphabet: a cross indicates a wreck, an asterisk indicates an outcropping rock, grouped dots represent coral reefs, and dashed lines mark the limits of restricted areas. Mastering these standardized symbols turns a seemingly complex map into a perfectly legible document that guides you accurately.
Identify underwater and coastal hazards
The ability to quickly identify hazards on a nautical chart is probably the most vital skill for any responsible navigator. Marine hazards take many forms, from visible obstacles like emerging reefs to sneaky threats like rockheads just below the surface. Each of these hazards has its own cartographic representation, designed to draw your immediate attention and allow you to plan a safe route. Understanding these representations requires methodical learning, but once acquired, this knowledge becomes a natural reflex that will allow you to scan a map in a few seconds to identify areas to avoid. Reading the dangers is not limited to identifying isolated symbols, it also involves understanding the general geographic context, the dominant currents, and the interaction between the various factors that can turn a seemingly innocuous area into a deathtrap for ships.
Reefs, Shoals, and Rock Heads: How to Spot Them Quickly
Sandbanks and silting areas: interpreting the seabed
Wrecks, obstructions and submarine cables: specific symbols to watch out for
Currents, tides and turbulence zones: reading hydrographic indications
Read depth information
The depth of the water under your keel is undoubtedly the most critical information for your immediate safety while navigating. An incorrect or careless reading of the depths can lead to a grounding, potentially catastrophic for your boat and dangerous for your crew. Nautical charts present depth information in several complementary ways, each providing a specific type of information that, combined with the others, gives you a three-dimensional view of the underwater landscape. Mastering the reading of these different representations requires practice, but this skill quickly becomes intuitive with experience. It is fundamental to understand that all the depths indicated on a nautical chart are referenced to a theoretical reference level called hydrographic zero, and that the actual depth at a given moment will depend on the state of the tide.
Understanding probes and hydrographic zero
Probes, numbers scattered over the entire surface of the nautical chart, represent depth measurements taken during hydrographic surveys and are your main source of information on underwater relief. Each probe indicates the vertical distance between the seabed and a specific reference level called hydrographic zero or chart zero. This reference level generally corresponds to the level of the lowest possible astronomical seas, i.e. the lowest level that the sea can theoretically reach under normal conditions. This convention guarantees a maximum margin of safety since, most of the time, the actual depth will be greater than that indicated on the map thanks to the effect of the tide. Probes are expressed in meters and decimeters on modern French maps, although you may still encounter ancient maps using fathoms or feet in some regions of the world. A careful navigator should always check the unit used by consulting the chart cartridge before interpreting the depths. The density of the probes varies by area: in well-mapped channels and busy areas, you will find numerous probes offering an accurate picture of the terrain, while in less frequented areas or on the high seas, the probes will be more spaced apart and will require mental interpolation to estimate the depth between two measured points.
How to interpret bathymetric lines
Bathymetric lines, also called isobaths or underwater level curves, are an extraordinarily powerful visual tool for quickly understanding the topography of the seafloor. These lines connect all points with the same depth, just as land level curves connect points of the same altitude on a typical topographic map. Isopaths are generally drawn at regular intervals, for example every two meters in shallow coastal areas, every five or ten meters in areas of medium depth, and every twenty or fifty meters in deeper areas. Some particularly important lines, such as the 10-meter line or the 20-meter line, are often drawn thicker than the others because they represent critical thresholds for many types of ships. The visual interpretation of isobaths allows you to instantly deduce the slope of the bottom: very close lines indicate a bottom that is rapidly descending or rising, often indicating a rocky drop off or an underwater cliff, while widely spaced lines reveal a gently sloping bottom, typical of sandy or muddy areas. This reading becomes particularly valuable when planning anchorages, as it helps you identify plateaus of stable depth where to anchor safely, avoiding slopes where your anchor might hunt.
Adapt your navigation according to the boat’s draft
Knowing exactly the draft of your boat is absolutely essential information to navigate safely, because it is this figure that determines the minimum depth required under your hull at all times. Draught is the vertical distance between the waterline and the lowest point on your boat, usually the keel or rudder. For a sailboat with a fixed keel, this value remains constant, but for a lift-off sailboat or a catamaran, it varies depending on the configuration and requires that you know both the draft (high drift) and (low) drift. When planning your route on the map, you should always add a margin of safety to your draft to take into account several factors: the position of the boat which temporarily increases the draft downwind, the state of the sea which can cause significant pitching, the uncertainty about the exact positions of the dangers, and the possibility of errors in your tide calculations. A safety margin of one meter is a reasonable minimum in normal coastal navigation, but this margin should be increased to two meters or more in case of difficult conditions or rough seas. Some navigators use the concept of a “waterway” by adding a fixed margin to their draft that they consider to be their absolute minimum depth, thus simplifying the reading of the map by simply avoiding any area with a depth less than this value.
Analyzing navigation aids on the map
Navigation aids are an indispensable network of visual and luminous landmarks that have guided mariners for centuries. This equipment, whether majestic lighthouses, modest beacons or floating buoys, is all carefully recorded on nautical charts with standardized symbols that specify not only their position but also all their technical characteristics. Understanding these symbols and knowing how to use the information they provide turns your navigation at night or in reduced visibility into a much safer and more confident experience. Each navigational aid has been placed in its specific location for a specific reason, usually to mark a hazard, indicate a navigable channel, or serve as a landmark to confirm your location. Learning to read them correctly and to use them methodically is a fundamental skill that will accompany you throughout your life as a navigator.
Lights, buoys, beacons: understanding their codes and characteristics
Sectors of visibility and bright flashes: avoid misinterpretations
Alignments and bitters: how to use them for safe navigation
Anticipate forbidden or restricted areas
The sea may seem free and borderless, but many areas are actually subject to navigation restrictions for a variety of reasons ranging from military security to environmental protection. Ignoring these restrictions may expose you not only to physical dangers but also to heavy administrative or criminal penalties. Nautical charts always show these restricted areas with specific symbols and boundaries, although it is sometimes necessary to consult additional nautical documents to obtain full details of the applicable restrictions. A responsible navigator must be aware of all the restricted areas on his planned route and plan alternative routes if necessary. This particular vigilance is all the more necessary as some restrictions change according to the seasons, the hours of the day or even according to temporary activities, the announcement of which may only be announced by notices to mariners.
Military zones, nature reserves and protected areas
Recommended shipping lanes and lanes
Temporary restrictions: how to identify them on recent maps
Use the nautical chart and modern tools together
Technological change has radically transformed navigation methods in recent decades, introducing electronic tools of remarkable precision and reliability. GPS, electronic chart plotters, digital sounders, and now sophisticated mobile applications have democratized navigation capabilities that were once reserved for professional vessels equipped with expensive instruments. However, this technological revolution does not make traditional methods of navigating with paper charts, compasses, and mechanical instruments obsolete. On the contrary, a truly professional approach to modern shipping involves harmoniously combining the advantages of contemporary technologies with the timeless reliability of classical methods. This philosophy of redundancy and complementarity ensures that you will always have the means to navigate safely, no matter what circumstances you may encounter.
GPS, trackers and navigation applications: advantages and limitations
The GPS system revolutionized navigation by offering positioning accuracy that would have seemed miraculous to mariners fifty years ago. Modern trackers display your position in real time on an electronic map with a margin of error generally less than ten meters, allowing you to track your progress with extraordinary precision. These systems can automatically calculate optimal routes, alert you when you deviate from your intended path, and set off alarms if you approach previously identified dangerous areas. Mobile navigation applications, which are becoming more and more sophisticated, bring remarkable features such as the integration of real-time weather data, the sharing of positions with other browsers, and even user communities that report the dangers encountered. However, all of these systems share a common weakness: their total dependence on electrical power. A simple battery failure, a short circuit caused by seawater, or a lightning strike can instantly deprive you of all your electronic instruments. In addition, although rare, the GPS signal can be disturbed by interference, extreme weather conditions, or even by military operations in certain sensitive areas. A wise browser therefore never relies entirely on these technologies, no matter how reliable they are in normal times, but always maintains alternative means of navigation that are immediately accessible.
Why the paper card is still essential in the event of an electronic failure
The paper nautical chart represents a technology that is centuries old, and yet it remains relevant today as a fundamental safety element on board any boat. Unlike electronic systems, a paper card does not require any energy source, does not fear humidity once laminated, is shock-resistant and remains perfectly legible in sunlight as in the dark with a simple flashlight. In the event of a total failure of your electronic systems, which may occur more easily than one might imagine, your paper map allows you to continue to navigate using traditional methods of navigating by estimate and by bearings. The overview offered by an unfolded paper map also has a distinct cognitive advantage compared to tracker screens that show only a limited portion of the area and can give a false impression of safety by masking dangers located just outside the displayed area. Many experienced navigators maintain the habit of regularly reporting their position on the paper map even when they have fully functional electronic instruments at their disposal, thus maintaining their traditional navigation skills and maintaining a permanent awareness of their global geographical location. This practice may seem superfluous in good weather and with all operational systems, but it can really save you when conditions worsen and fatigue, stress, or a failure deprive you of your usual electronic tools.
Updating the charts: manuals, editions and nautical information
The seabed, navigational aids, and maritime regulations are constantly evolving, making it essential to regularly update your nautical charts to ensure that they accurately reflect current reality. An outdated map can mislead you by indicating a light that has been moved, by omitting a new buoy recently installed, or by not mentioning a new navigation restriction established after it was published. For paper maps, national hydrographic services regularly publish correction booklets called “Mariners Advisory Group” which list all the changes to be made to official maps. A conscientious navigator should ideally put these handwritten corrections on his charts before each important navigation, although this tedious practice is unfortunately often overlooked by boaters. A more practical alternative is to periodically buy new editions of the charts you use frequently, especially for your usual sailing areas. E-charts have a significant advantage in this area since their updates can be downloaded and applied automatically, ensuring that you are always browsing with the most up-to-date information. However, even with electronic cards, it is still crucial to check the availability of updates regularly and to install them, as some systems do not do this automatically. The date your maps were published or last updated should always be checked before navigating, and any maps older than two or three years should be considered potentially outdated and used with extra caution.
Practical tips for avoiding dangerous areas
Beyond the simple technical ability to read a nautical chart, developing a rigorous methodology and safe habits is the essence of responsible navigation. Maritime accidents rarely result from a single isolated error, but rather from an accumulation of small carelessness and a lack of systematic preparation. The most experienced mariners will tell you that safety at sea is based on a constant state of mind of vigilance, meticulous preparation and humility in the face of natural forces. This philosophy is translated into concrete practices that, although they may seem restrictive at first, quickly become natural reflexes and accompany you throughout your life as a seafarer. By integrating these methods into your sailing routine, you drastically reduce the risk of incidents and give yourself the best chance of returning to port safely after each sea trip.
Methods of cross-referencing information for greater security
Early reading before the release: prepare your way
Adapt the speed and keep an active watch
Click here to continue reading
Original article published on oria-marine.com